
Vaping enthusiasts often reach a point where pre-made coils no longer satisfy their craving for flavor, vapor, and control. Building your own coils is not just a cost-saving technique—it’s an art that allows you to customize your vaping experience down to the last detail. This guide will walk you through everything you need to know about DIY coil building, from understanding materials to mastering advanced techniques, while keeping safety at the forefront.
Why Build Your Own Coils?
Many vapers start with pre-made coils, but building your own provides several distinct advantages. First, it allows you to personalize resistance and airflow, which directly affects flavor intensity and cloud production. Second, DIY coils often last longer when built and wicking properly, saving money in the long run. Third, coil building can be a creative and satisfying hobby; experimenting with wire types, coil configurations, and wicking materials can transform the mundane act of vaping into a hands-on science.
Additionally, advanced DIYers appreciate consistent performance. With pre-made coils, results can vary from batch to batch, while your own builds provide repeatable satisfaction once you master the technique. For those interested in exploring sub-ohm builds or temperature control, learning to construct coils is the first step toward full customization.
Essential Materials for Coil Building
Before touching a coil jig or wire, you must understand the materials involved. Wire types are fundamental to both safety and performance. Common wires include Kanthal, Nichrome, and Stainless Steel. Kanthal is forgiving, durable, and ideal for beginners, while Nichrome heats faster and produces a more intense flavor. Stainless Steel works in both wattage and temperature control modes, making it versatile for advanced vapers.
The wire gauge determines the coil’s resistance and surface area. Thinner wires heat faster and produce more flavor, but can be fragile. Thicker wires are more robust and last longer, but require more power to achieve optimal vaporization. Beginners often start with 26–28-gauge Kanthal wire, as it strikes a balance between ease of handling and performance.
Wicking materials are equally crucial. Organic cotton is the standard choice due to its absorbency and flavor neutrality. Alternatives like rayon, hemp, or specialized vape wicks can enhance flavor or longevity, but each requires proper preparation to avoid dry hits or chemical contamination.
Safety First: What Every Vaper Should Know
Before we get into step-by-step instructions, a word about safety. Nicotine exposure, battery handling, and high-resistance builds can be hazardous if ignored. Always wear protective gloves when handling wire to prevent cuts, and handle batteries with care, avoiding contact with metal objects that can cause short circuits. Check the resistance of your coil with an ohmmeter before firing, especially if you plan to use sub-ohm builds. Missteps here can damage your mod or pose serious safety risks.
Also, avoid using wires or wicks that are contaminated, old, or damaged. Consistently inspect your coils and wicks for signs of overheating or degradation. These precautions might seem obvious, but in the DIY world, diligence separates a safe, enjoyable vaping experience from potential danger.
Step-by-Step Guide to Building a Simple Coil
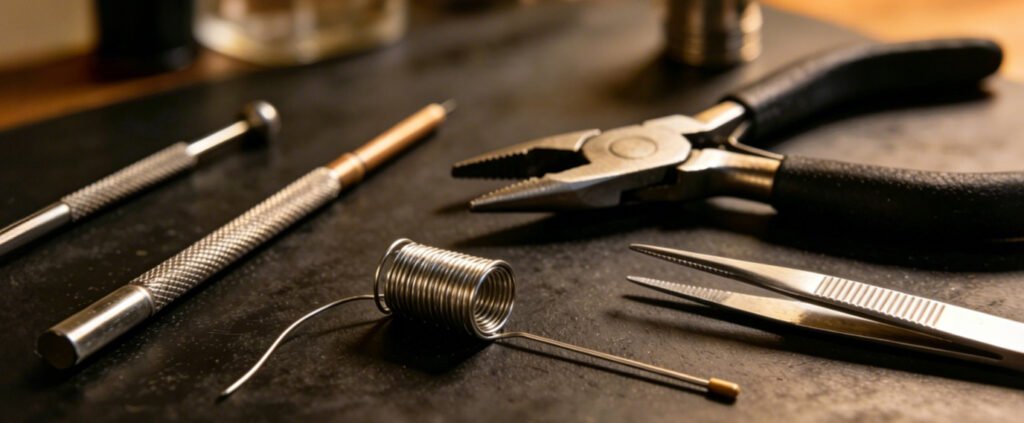
(1) Measure and Cut Wire
Cut a length of Kanthal wire, roughly 10–12 cm, for a standard RDA (rebuildable dripping atomizer). The length varies depending on the number of wraps and the diameter you choose.
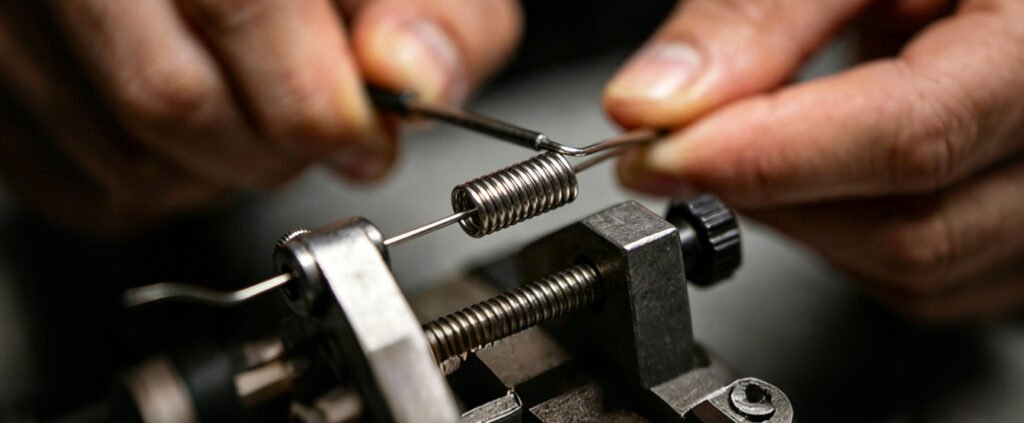
(2) Wrap the Coil
Using a coil jig or small screwdriver, wrap the wire tightly around a 2–3 mm diameter rod. Aim for 5–8 wraps for a beginner coil. Ensure the wraps are even, as uneven coils can cause hot spots.
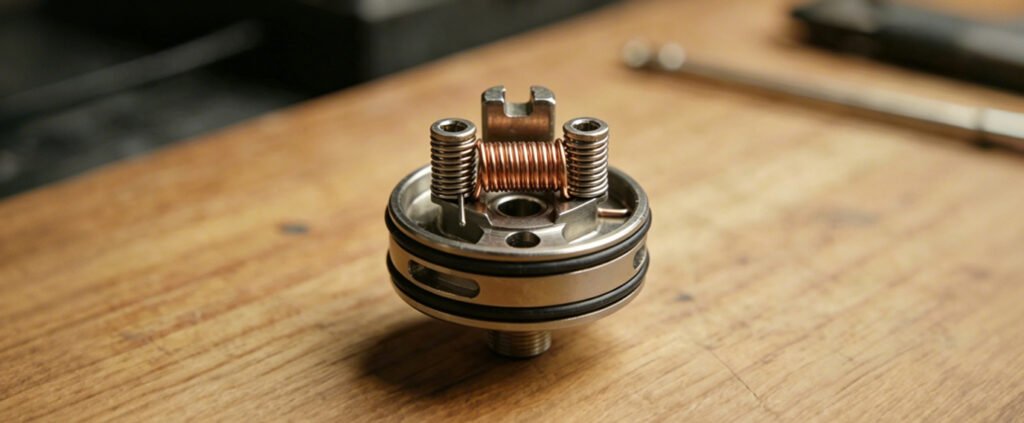
(3) Install the Coil
Place the coil in the deck of your RDA, securing the ends under the posts’ screws. Center the coil above the airflow for optimal flavor and vapor production. Make sure the coil does not touch the deck or cap, which could cause shorts.
(4) Check Resistance
Use an ohmmeter or your mod’s built-in reader to verify the coil’s resistance. Beginners should aim for a moderate resistance, usually between 0.5 and 1.0 ohms, depending on their device’s capabilities.
(5) Dry Burn the Coil
Fire the coil at a low wattage to remove hotspots. Pinch or strum the coil gently with ceramic tweezers if necessary to eliminate uneven heating. The coil should glow evenly from the center outwards.
(6) Insert Wick
Cut a strip of organic cotton, twist one end, and thread it gently through the coil. Trim excess cotton and fluff it to allow smooth e-liquid absorption.
(7) Prime the Coil
Saturate the wick with your preferred e-liquid. Avoid oversaturating, which can cause leaks, or undersaturating, which can lead to dry hits.
(8) Final Check
Fire the coil at a low wattage to ensure even vapor production and check for any unusual resistance spikes. Adjust the wick or coil if necessary.
Advanced Techniques for Experienced Vapers
Once comfortable with the basics, you can explore more advanced builds that enhance flavor and cloud performance. Dual-coil setups provide balanced vapor distribution and stronger flavor. Clapton coils, which involve wrapping a thinner wire around a thicker core, increase surface area for e-liquid absorption, intensifying flavor and cloud density. Fused Claptons or alien coils offer further innovation but require patience and precision.
Vapers experimenting with sub-ohm builds can achieve massive clouds and intense flavors, but these require a thorough understanding of Ohm’s law, battery limits, and heat management. Similarly, temperature control builds rely on stainless steel or nickel wire, which react predictably to changes in voltage, preventing dry hits and extending coil life.
Troubleshooting Common Coil Problems
Even experienced coil builders encounter issues. Hot spots—areas of uneven heating—are common, often caused by uneven wraps or loose connections. Correct them by dry-burning at low wattage and adjusting the coil with ceramic tweezers. Leaking or dry hits typically indicate improper wicking. Too much cotton restricts e-liquid flow, while too little results in burnouts. Experimentation and adjustment are key.
Another common problem is coil gunk, the buildup of residue from e-liquid flavorings. Regular cleaning by dry-burning or soaking in warm water or vodka can restore performance. For advanced vapers, reusing wire for multiple builds is possible, but always inspect for degradation to avoid safety risks.
Pro Tips to Take Your Coil Building to the Next Level
- Pre-stretch wires: Gently stretching your wire before wrapping can reduce kinks and hot spots.
- Micro-spacing coils: Slightly spacing your wraps improves airflow and flavor saturation in single-coil builds.
- Twisted or parallel wire builds: Combining wires in unique configurations changes resistance and vapor characteristics.
- Custom wicking shapes: “Braided” or folded cotton wicks can enhance e-liquid absorption and extend coil life.
- Flavor layering: Using multiple coils in a single atomizer with complementary e-liquids can create custom flavor profiles.
Conclusion
Building your own vape coils transforms your vaping experience, giving you control over flavor, vapor, and device performance. While it requires patience, practice, and attention to safety, the rewards are immense: a personalized, cost-effective, and creative hobby. Start with simple builds, master the fundamentals, then explore advanced techniques to fully unleash your vaping potential. Remember, safety and preparation are just as important as creativity—your coils are only as good as the care you put into them.
FAQ
(1) What wire type is best for beginners?
Kanthal wire is ideal for beginners due to its durability, ease of use, and predictable resistance. Nichrome and Stainless Steel are better for advanced builds.
(2) How do I prevent hot spots in my coil?
Dry-burn your coil at low wattage, strum gently with ceramic tweezers, and ensure even wraps. Micro-spacing the coil can also help.
(3) What gauge wire should I use for my first coil?
26–28-gauge Kanthal wire is beginner-friendly, balancing ease of wrapping and optimal resistance.
(4) How often should I replace my coil or wick?
Replace wicks when flavor weakens or the cotton darkens. Coils can last weeks if cleaned properly, but replace if the wire degrades or hot spots persist.
(5) Is it safe to build sub-ohm coils at home?
Yes, if you understand Ohm’s law, battery limits, and coil resistance. Always check resistance before firing and follow safety protocols.


Leave a reply
Leave a reply